

Editor: Terry Shi
The founder of FLOORCO, with a strong industry background and substantial supply chain resources.
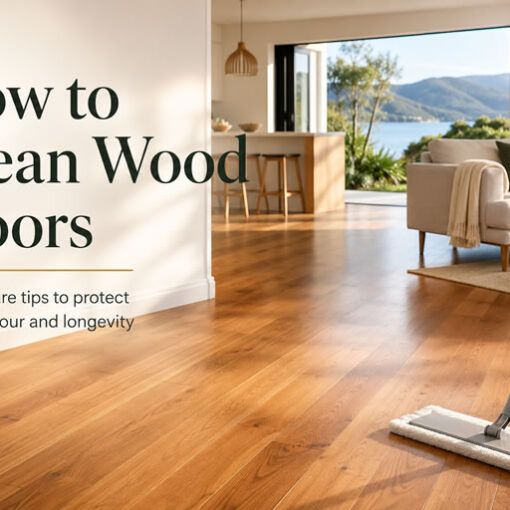
A well-kept wood floor, with regular maintenance, can absolutely transform the feel of a home and enhance its longevity. But, as anyone who actually lives with timber underfoot soon learns, the beautiful sheen of freshly laid flooring can give way to scuffs, scratches, and all manner of dents with alarming speed. Chairs scrape, the vacuum cleaner goes rogue, pets skitter through the lounge, and now there’s a big mark right in the middle of your otherwise perfect floorboards, prompting consideration for a repair workshop.
The good news? You don’t have to put up with scratched or dented wood floors, nor do you need to call in a professional every time life leaves its mark. There are some practical, tried-and-true ways you can get those floors looking a lot closer to new, without breaking the bank.
Let’s get hands-on with some Kiwi-friendly fixes that really work, and turn your space into a workshop full of projects while becoming a hub of knowledge for the community.
Understanding Your Floor
Before you break out the sandpaper or splash out on your local hardware store’s entire repair section, take a moment to identify what sort of timber floor you’re dealing with. Not all fix-ups are created equal:
- Solid hardwood: The entire board is timber all the way through, which means it can generally be sanded and refinished multiple times.
- Engineered wood: A real wood veneer on top of a stable plywood or composite base. You can sand it, but only lightly and only a few times.
- Laminate: Actually not timber at all, but a photographic layer under a hard resin top – repairs are more superficial and sanding is out.
Knowing what you have is the first step to getting DIY repairs right.
Quick Fixes for Light Scratches
Surface scratches are barely visible unless the light hits them just so. While minor, they’re also the sort of thing that slowly drives perfectionists up the wall.
Here are a few straightforward projects and techniques:
1. Clean First
Often, it’s old dirt, dust, or floor polish residue that exaggerates a scratch. Vacuum and wipe the area thoroughly with a slightly damp (not wet!) cloth to remove anything that might get in the way of your repair.
2. Buff With a Walnut
It’s not a myth: the natural oil in walnuts can help disguise scratches on real timber. Simply crack the nut, rub the kernel gently along the scratch’s length, let the oil soak in for a few minutes, then buff with a soft cloth. For pale woods, consider using a pecan or almond instead.
3. Use a Wood Touch-Up Pen
Hardware stores offer coloured markers designed for this exact job. Match the pen as closely as possible to your floor (test in an out-of-sight area first). Run the pen over the scratch, wipe off any excess, and let it dry. It works especially well for small nicks and scuffs.
4. DIY Polish Mixture
Mix olive oil and vinegar (about a 1:1 ratio), dab a soft cloth in the mix, and gently rub into the scratch. Wipe away any excess to avoid a slippery patch.
5. Store-Bought Solutions
Products like Old English Scratch Cover for dark or light woods are worth having in the cleaning cupboard. They basically stain the exposed scratch, making it much less noticeable.
Strategies for Deeper Scratches
When you run a fingernail over the scratch and it catches, you’re dealing with something that’s cut more deeply into the timber’s surface, requiring regular maintenance to ensure it doesn’t worsen.
Here’s what can help during projects in a workshop:
1. Wax Repair Sticks
Furniture repair wax crayons or sticks (available at Mitre 10, Bunnings, or specialist flooring suppliers) come in an assortment of timber shades. Warm up the tip of the stick between your fingers, press it into the scratch, and level it off with an old credit card. Buff with a lint-free cloth to blend the repair.
2. Wood Filler
For bigger or wider scratches, use a pre-mixed timber filler. Apply with a putty knife, scrape off the excess, and allow to dry. Sand gently (use fine 220-grit sandpaper) and touch up with stain or marker as needed. Remember: for engineered floors or laminate, spot sanding can damage the protective top coat, so be conservative.
Handling Dents Without Drama
Dents look like small indents or valleys and can make even quality timber floors feel a bit tired, impacting their longevity. Fortunately, many dents (especially in solid wood) are easier to handle than deep gouges, and addressing them promptly can help preserve the sense of community within a space by maintaining its aesthetic and functionality.
The Steaming Technique
Solid wood has “memory” and can swell back into shape with a little encouragement. Here’s the Kiwi classic trick:
- Place a damp (not soaking wet!) tea towel over the dent.
- Use a medium-hot household iron – no steam – and press it onto the towel for a few seconds at a time.
- The heat and moisture help the timber fibres absorb water and regain their original shape.
Lift the towel after each go and check progress on your projects. Often, a few passes will do the trick. Be careful not to overdo it or use too much water, especially on engineered wood (which can be overwhelmed with moisture and bubble).
Repair Comparison Table
Here’s a quick reference to help choose the right method:
| Problem | Surface (run finger and can’t feel) | Visible, can feel scratch | Dent/Indentation |
| Walnut/Oil Mix | ✅ | 🚫 | 🚫 |
| Touch-Up Pen | ✅ | ✅ | 🚫 |
| Wax Stick | 🚫 | ✅ | 🚫 |
| Wood Filler | 🚫 | ✅ | 🚫 (for deep indents only) |
| Steam/Iron | 🚫 | 🚫 | ✅ (solid wood mainly) |
🚫= Not suitable ✅ = Good option
How to Tackle Laminate or Pre-Finished Flooring
Laminate floors are popular in Kiwi homes for their durability and affordability. While they’re tough, they don’t respond to sanding or steaming. If you’ve got a scratch on laminate, your best options are:
- Furniture scratch markers or putty, coloured to match your floor.
- Special laminate floor touch-up kits (check with your supplier).
- For wide, deep damage: if you have spare planks, it might be easier to swap out the affected board.
Pre-finished engineered floors are also best repaired with touch-up kits, wax sticks, or markers.
When Deeper Damage Strikes
Sometimes, a scratch is so deep, or a board so dented, that even a specialized workshop won’t provide the usual fixes needed. If you own a solid timber floor, board replacement or professional sanding/refinishing may be needed. This is especially true if the finish itself is worn down to bare wood in traffic zones.
Signs it might be time for a more serious intervention:
- Multiple scratches in a high-traffic area
- Black marks or moisture stains that rubbers and polishes can’t mask
- Large dents or gouges from dropped furniture
For these scenarios, getting a flooring professional in for a quote might be well worth it.
Preventative Tips to Keep Wood Floors Looking Fresh
While marks and dents are pretty much guaranteed over the years, regular maintenance and a few habits can enhance the longevity of your flooring, reducing the frequency and severity:
- Use felt pads under furniture legs, especially on chairs and tables that are constantly being moved.
- Pick up heavy furniture rather than dragging it.
- Rug high-traffic corridors, kitchen aisles, and entryways.
- Trim pet nails to limit scratching.
- Sweep or vacuum frequently: grit and pebbles act like sandpaper.
- Take off shoes at the door, especially high heels and sports boots.
Why Your Choice of Flooring Matters
Some floor finishes shrug off scuffs better than others. FLOORCO’s diverse range, from robust SPC options to engineered wood planks, means there’s something to suit every household’s wear-and-tear level. Their years in the local market have seen them cater to thousands of New Zealand families—many in the community who come back for the next renovation thanks to that reliability.
While any wood floor will eventually collect a few character marks, quality products make fixing them easier—and less frequent. For anyone considering a new floor, it’s worth balancing appearance, price, repairability, and the scope of any associated projects from the outset.
Keeping Floor Repairs Simple
Most everyday dings and scratches can be handled in less than half an hour with nothing more than a box of wax sticks, a clean cloth, a workshop approach, and the right attitude. A little know-how goes a long way, whether you’re living with century-old kauri or a slick new laminate from FLOORCO.
In summary: don’t panic when the next mark appears on your flooring projects. A careful approach, the right repair method, and looking after your floors day-to-day will help keep your timber looking sharp and welcoming for years to come. If your flooring needs outgrow the patch-and-repair phase, there are options for every budget, so your home can really show its best face.


