
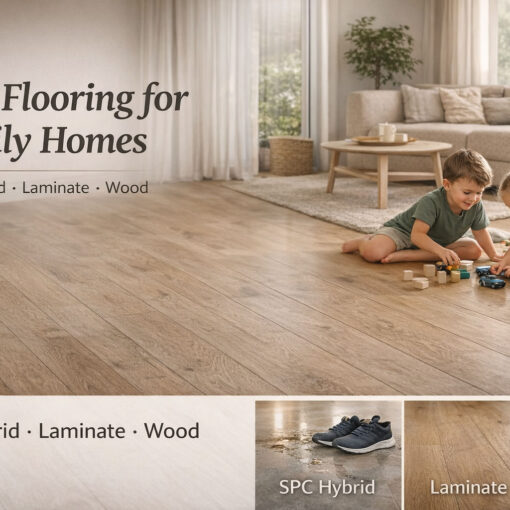
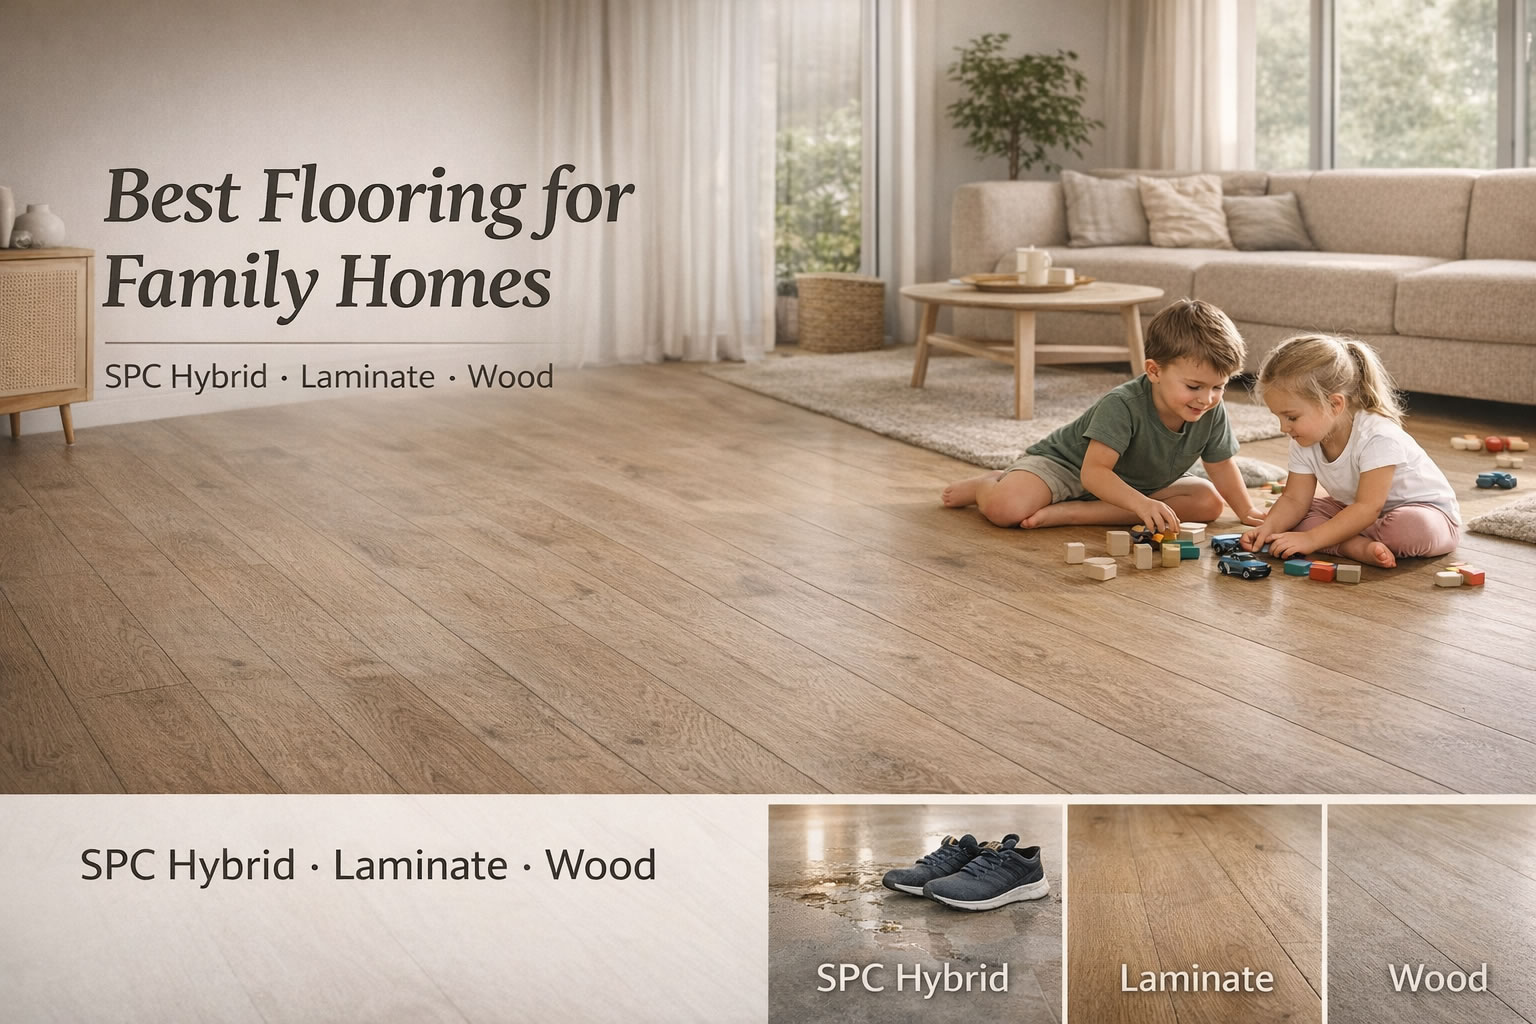
Choosing laminate flooring is easy when you only focus on colour. Choosing the right laminate for how New Zealand homes are actually lived in is where it matters.
Kids coming in with wet shoes, sand from the beach, pets running through the hallway, strong sun through ranch sliders, and winter humidity changes all test a floor far more than a showroom sample ever will.
The good news is that once you understand a few key specifications — wear rating, water resistance, thickness, underlay, and installation quality — choosing well becomes much simpler.
Quick take: what matters most
- Aim for AC4 or AC5 wear ratings for busy Kiwi households
- Pick water‑resistant laminate for kitchens and entries, not regular laminate
- Go thicker if you want a quieter, more solid feel underfoot
- Choose a decent underlay with acoustic and moisture control suited to your subfloor
- Plan for sun: UV‑resistant finishes reduce fading in bright rooms
- Make sure the product is OK with underfloor heating if you have it
- Check VOC and formaldehyde ratings for healthier indoor air
- Get installation details right: acclimation, expansion gaps, transitions, and moisture barriers
- Buy from a supplier who holds stock in NZ and can back you with accessories and advice
How laminate is built and why it matters
Laminate is a layered product. Most quality boards use a high-density fibreboard core with a printed décor layer that carries the timber look, covered by a protective melamine wear layer. That top layer handles the scrapes and chair legs. The core handles changes in moisture and provides strength.
Click‑lock systems mean the floor floats over an underlay rather than being glued down. That makes installation faster and easier to repair, but it also means you need expansion gaps at the edges and around fixed items. A good click profile (Unilin or Välinge types) won’t chip or “telegraph” gaps over time.
Water-resistant laminate uses tighter locking systems, waxed edges, or a special core that reduces swelling. It still isn’t for showers or wet rooms, but it will handle kitchen spills much better.
Matching laminate to NZ conditions
New Zealand homes deal with a mix of climate quirks.
- Humidity swings: Auckland sits humid for long stretches, Wellington throws windy, wet weeks at you, then Central Otago gets months of dry cold. Flooring that says to acclimate for 48 to 72 hours at the site will perform more predictably.
- Sunlight intensity: UV levels in NZ are high. A fade‑resistant finish helps, and lighter tones hide sun fade better than deep browns.
- Sand and grit: Coasts mean abrasive particles. A tougher wear layer and a decent entry mat are a must.
- Heating: If you run hydronic or electric underfloor heating, check the floor is rated for it, keep the surface temperature at or under 27°C, and choose a low‑R underlay.
Apartments have another factor: impact sound rules in the body corporate bylaws. Ask for the acoustic data of the full system (flooring plus underlay) and aim for a test with Ln,w or IIC results that meet your building’s target.
Durability ratings decoded
AC ratings tell you how tough the surface is. For a typical family home, AC4 hits the sweet spot. For larger households, active dogs, or short‑term rentals, AC5 is worth it.
| AC rating | Typical use | Scratch and wear resistance | Good for |
| AC3 | Light residential | Lower | Bedrooms, low‑traffic studies |
| AC4 | General residential | Higher | Living rooms, halls, family homes |
| AC5 | Heavy residential and light commercial | Highest | Busy homes, rentals, home offices with wheels |
If you have swivel chairs, use hard-floor caster wheels and a mat, even on AC5. Sharp grit will scratch anything eventually.
Water and kitchens: know the limits
Standard laminate hates standing water. Modern water‑resistant lines deal with spills better and often come with a time rating. You’ll see claims like 24-, 48-, or 72-hour spill protection. That means if you wipe up puddles within that window, you avoid swelling at the edges.
- Kitchens, entries, and laundries: pick water‑resistant laminate and add silicone or sealing strips at perimeters where the installer advises.
- Bathrooms: still a no for most laminate. Go SPC or tile.
- Cleaning: Avoid steam mops and very wet cleaning. Microfibre and a laminate‑safe cleaner are the move, alongside regular maintenance tips to keep your floors looking their best.
Thickness, plank size, and feel underfoot
Thickness is often between 7 and 12 mm. More thickness can improve sound, stability, and the feel underfoot.
- 7 to 8 mm: budget-friendly, lighter traffic, upstairs rooms
- 10 to 12 mm: better sound and a more solid step, recommended for living areas
Plank width changes the look. Wide planks (200 to 240 mm) lean modern and make smaller rooms feel larger. Narrower boards give more movement in the pattern and suit older villas with more visual character.
Edge style matters too. A micro‑bevel gives a real timber shadow line and hides tiny height variations. Square edges give a clean sheet look but show any subfloor unevenness.
Texture adds realism. Embossed in register means the woodgrain texture matches the printed pattern. It looks more natural under sunlight and hides everyday marks.
Underlay: quieter, warmer, drier
Underlay does more than make it comfy.
- Acoustic: Look for dB reduction figures or IIC/Ln, with data. A quality 2 to 3 mm acoustic underlay makes a real difference, especially in multi‑level homes and apartments.
- Moisture control: On concrete slabs, use an underlay with an integrated vapour barrier or lay a 200 micron polythene sheet under the underlay if the slab condition is unknown.
- Thermal: If you run underfloor heating, pick a low‑thermal resistance underlay, and check that the combined R‑value of floor plus underlay fits your heating system advice.
A small cost jump on underlay often pays back with quieter rooms and fewer callbacks later.
Subfloors and prep
Good floors start with good prep.
- Concrete: Check for moisture with a proper test if the slab is new or the site has a history of dampness. NZ slabs built since the 1990s should have a damp‑proof membrane, but renovations and older homes are a mixed bag. Self‑levelling compounds fix dips and waves. Laminate needs flatness within the manufacturer’s tolerance, often around 3 mm over 2 m.
- Timber: Fix any squeaks, add extra screws to tighten loose boards, plane high spots, and overlay thin plywood if the surface is patchy. Remove tacks and staples.
- Tiles: You can float over tiles if they are solid, but check height transitions and plan trims at doorways.
A few hours spent getting the subfloor right, coupled with following key maintenance tips, saves days of frustration later.
Installation tips for DIY or pro
Floating laminate is popular with DIYers. It still pays to follow every step.
- Acclimation: Store boxed boards in the room for 48 to 72 hours at site temperature and humidity.
- Expansion: Leave 8 to 12 mm at walls, around pipes, and fixed cabinetry. Large rooms may need expansion joints based on the product’s maximum run length.
- Layout: Pull boards from multiple boxes and shuffle to avoid repeating patterns. Dry‑lay a few rows to dodge awkward slivers along walls.
- Cuts: Use a sharp blade and cut face up on a mitre saw for clean edges. Masking tape on cuts helps with chipping on some decors.
- Stairs: Most laminates can be used on stairs with glued installation and matching nosings. That is best left to a pro.
- Skirtings and trims: You can remove and refit skirting for a clean look or use scotia trims to cover gaps.
If in doubt, pay a certified installer. The cost is small compared with redoing a floor.
Health, safety, and sustainability
A floor is a big indoor surface, so keep it safe and low-emission.
- Formaldehyde: Look for E1 or better, or EN 717‑1 reports. Some lines also carry CARB Phase 2 or Greenguard labels.
- Wood sourcing: FSC or PEFC tracked inputs are common on better brands.
- Slip resistance: Residential laminate is usually fine when dry. In wet zones, you should be using other products anyway.
- Fire: If you are fitting common access areas or apartments, ask for critical radiant flux test results to meet NZBC requirements.
Cost breakdown in NZ dollars
Prices vary by brand and finish, but these ballpark numbers help with planning.
| Item | Typical range (NZD per m²) | Notes |
| Laminate boards | 25 to 65 | AC4 to AC5, standard to water‑resistant, 7 to 12 mm |
| Underlay | 3 to 15 | Per linear metre, colour-matched costs more |
| Trims and scotia | 10 to 40 | Carpet uplift and tile removal is more |
| Floor prep | 25 to 40 | Levelling, ply overlay, minor fixes; job dependent |
| Installation | 30 to 55 | Site, stairs, and location can change this |
| Old floor removal | 10 to 25 | Carpet uplift and tile removal are more |
A typical 80 m² living area in a Kiwi home can cost between 6,000 and 9,500 installed, depending on choices and prep.
Warranty and what it really covers
Most reputable laminate lines offer 15 to 30 years for residential wear. Water‑resistant products may have a spill warranty measured in hours and tied to proper installation with edge seals. Read the fine print:
- Pet claws are fine, but deep scratches from stones or metal chair glides are not covered
- Moisture from below, due to a missing vapour barrier, is excluded
- Improper cleaning, steam mops, and soaking void coverage
- UV fade limits can apply, so ask for data if your space gets strong sun
A good retailer will explain what is realistic for your home.
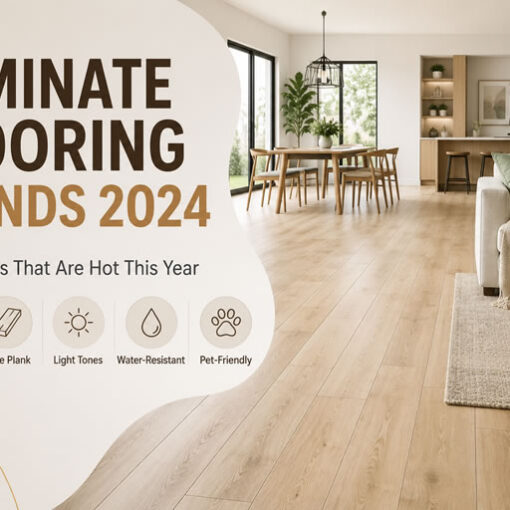
Style choices that suit Kiwi homes
Neutral, coastal looks keep winning here. Light oaks, driftwood tones, and soft greys suit bright spaces and make rooms feel larger. Mid-tones in the taupe family hide dust better than very dark boards.
A few handy style notes:
- Sun direction: North‑facing rooms accentuate texture. Embossed in register looks very convincing under strong light.
- Width and length: Longer, wider boards reduce visible joins and modernise a 1990s layout.
- Bevel or not: Micro‑bevels give a timber vibe and hide minor height steps across boards.
- Matching trims: Colour-matched scotia and stair nosings tidy up the finish and are worth the slight premium.
Always take a full‑size sample home. Place it next to your kitchen cabinets, sofas, and curtains at different times of day. Phone photos can be misleading, and indoor lighting shifts colours.
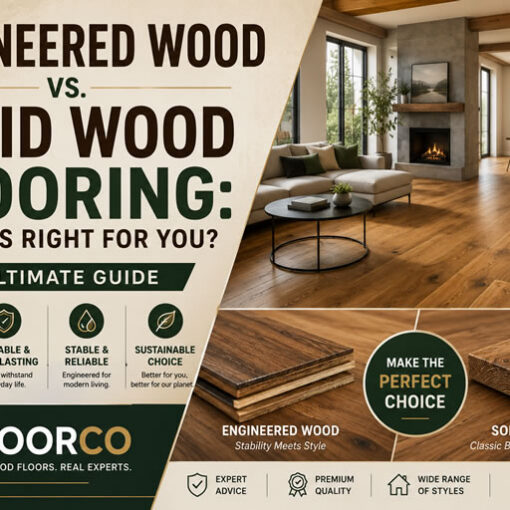
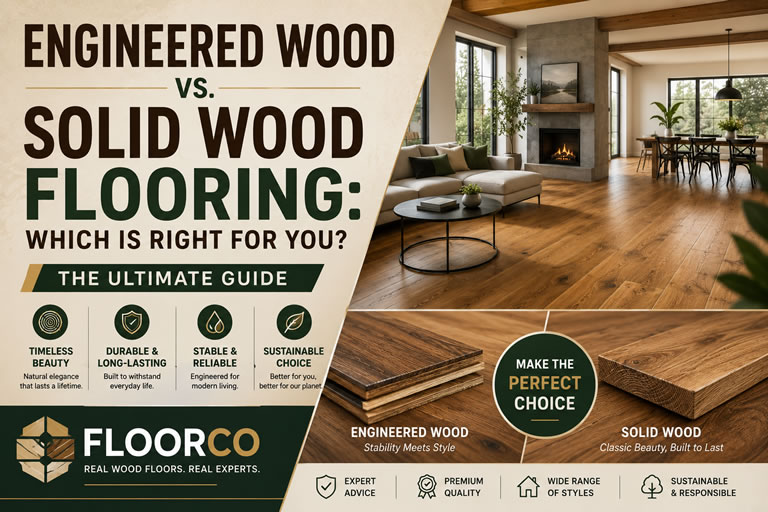
When to consider SPC or engineered wood instead
Laminate is a great all‑rounder for most living areas. There are times when another category fits better.
- SPC (stone-plastic composite): Better suited for areas with higher water risk, such as laundries and entrances. It is dimensionally very stable, takes everyday spills in its stride, and is easy to clean. It can feel a little firmer underfoot.
- Engineered wood: Real timber veneer over a stable core. It brings natural variation and can add value in high‑end renovations. It costs more and needs more care with water.
Plenty of homes mix categories. Laminate in living spaces, SPC in the laundry, and engineered wood in a formal lounge is a common combination.
Working with a local supplier
Stock on the ground cuts weeks off timelines and makes after‑sales service easier. One example is FLOORCO, based in Auckland since 2015. The team behind the brand brings decades of trade and manufacturing experience and sets up a supply chain that runs from raw materials to finished product. That structure reduces overheads and keeps pricing sharp.
What stands out for busy homeowners and tradies:
- Over 1,000 products in range across laminate, SPC, and engineered timber
- Around 300,000 square metres are held in warehouses for quick turnarounds
- A spread of colours, finishes, and widths to fit modern builds and villa updates
- Big brand options alongside in‑house labels to hit different budgets
- Consistent availability of trims, underlay, and accessories
If you want to keep a project moving without backorders, a distributor with deep stock helps a lot.
Specs checklist before you buy
- AC rating: AC4 or AC5 for family homes
- Water‑resistance: stated spill time and any required edge sealing
- Thickness: 10 to 12 mm for main living, 7 to 8 mm for lighter areas
- Click system: proven profile that installers know well
- Underlay: acoustic, moisture barrier if on concrete, and low‑R for underfloor heating
- VOCs: E1 or better, ask for EN 717‑1 or similar reports
- UV: fade resistance data if your rooms get a lot of sun
- Subfloor plan: levelling, moisture checks, and transition heights sorted
- Acoustic data: required for apartments and terraces with shared walls
- Warranty: written terms in plain language, including water and pets
- Stock: confirm local availability of boards, trims, and stair nosings
- Installation: acclimation time, expansion gaps, and maximum run lengths in the manual
Laminate Flooring That Fits the Kiwi Way of Living
Choosing the right laminate flooring is about more than colour and texture — it’s about performance that fits the Kiwi lifestyle. From Auckland’s humid summers to the cool, dry air of the South Island, quality laminate can bring warmth, durability, and easy maintenance to every home when you choose the right specification.

Editor: Terry Shi
The founder of FLOORCO has a strong industry background and substantial supply chain resources.
