HOW TO FITTING WOOD FLOORING, HARDWOOD TIMBER INSTALL
BARLINEK ENGINEERED WOOD FLOORING – GLUE-DOWN INSTALLATION


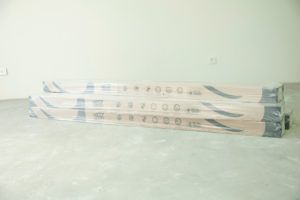
Purchased packages of wooden floors should be placed horizontally in the room where the Barlinek board is to be laid for a period of at least 48 hours, in the original packages. The humidity of the substrate should be up to 2% for cement, up to 0.5% for anhydrite measured with the CM method. The relative air humidity of the air should remain within the range of 45% and 60% and the air temperature during installation and use within 18°C and 24°C (64.4°F and 75.2°F).
The purpose of installing a wooden floor using a glue-down method is to immobilise it and permanently bond it to the substrate so that in the future, during its many years of use and various loads on the floor, there will be no defects. A glued-down wooden floor is much easier to renovate / sand. Glue-down installation of the wood floor increases acoustic comfort in the room, the floor is quiet and walking sounds are less audible.
Solvent and dispersion adhesives cannot be used. One-component adhesives are recommended: PU (polyurethane), MS (silane), MSP (MS polymer) designed for engineered wooden floors which are finished during the production process.
When wooden floor install, do not place an underlay on the glue. The only element between the substrate and the floorboard is glue.
Likewise, when installing using a floating floor system, it starts with the preparation of the substrate. Make sure it is even, measure its humidity and check its strength.
The substrate for layered boards should meet the following strength requirements:
– strength of the underlay on the wall 1.2 N/mm2
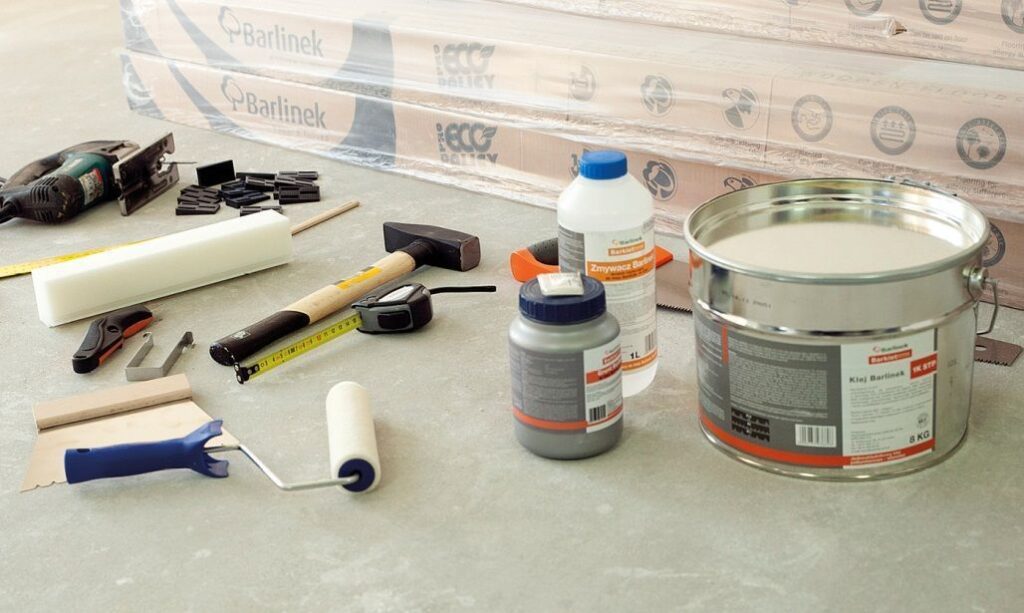
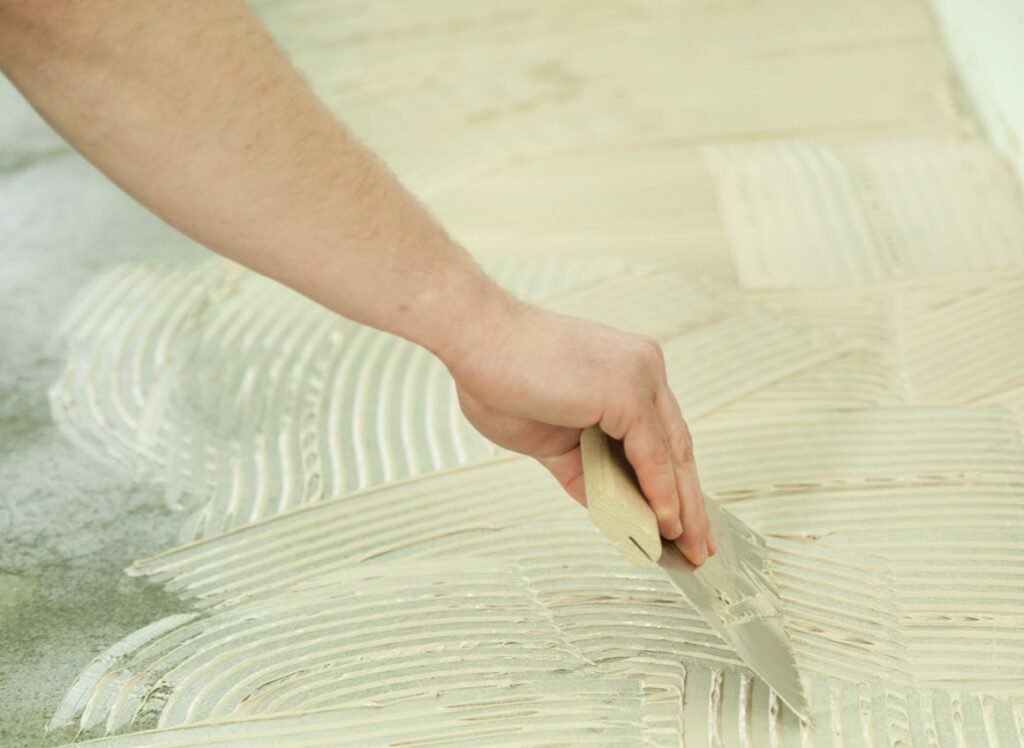
To lay a wooden floor using the glue-down method, you need tools, however, with the difference that the additional tool is a notched trowel (here we recommend B11 trowel, in which the spacing between the teeth is exactly 11 mm). The glue efficiency when using a trowel with such a teeth spacing is approx. 1 to 1.2 kg/m2.
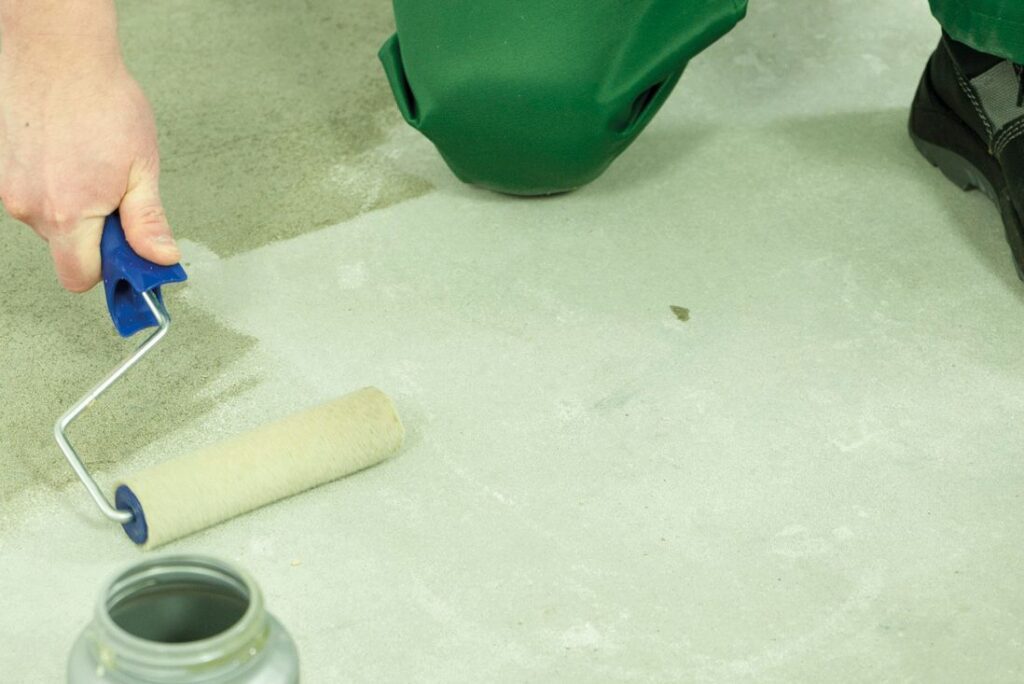
Having the substrate prepared in such a way, it is necessary to start priming it. The primer must be prepared in accordance with the manufacturer’s recommendations. Using a paint roller, apply it evenly to the substrate, avoiding puddles. If you use Barlinek primer, you can start gluing after 120 to 150 minutes.
ENGINEERED WOOD FLOORING GLUE
wood flooring install
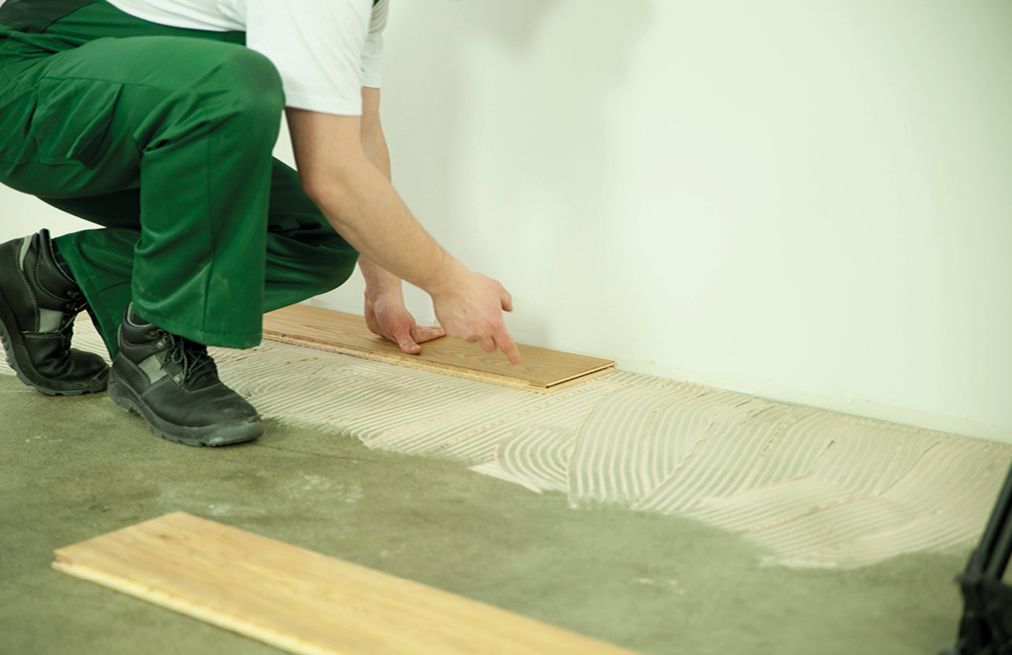
Apply the glue (e.g. Barlinek glue – 1KSTP single component polyurethane glue, with a suitably elastic adhesive) with a B11 notched trowel, carefully spreading it into the substrate. Finally, the glue tooth should be formed in such a way that it is not excessively flattened. The glue should be applied on the substrate and prepared for no more than 2 rows. After gluing-down the floor boards, you have to press them to the ground, which in practice means, for example, placing the remaining packages on the floor in several places in the room – thus pressing the floor, you can be sure it will be equally glued in every place, and the glue will adhere to the entire floor substrate.
Single-component polyurethane-silane glue, combines the advantages of polyurethane and silane glues. It is intended for gluing layered floorboards, solid floorboards, mosaic, traditional, layered, industrial 16-22 mm parquet as well as exotic parquet connected by means of tongue and groove joints. The glue can be used on cement and anhydrite screeds, concrete and ground OSB. It is suitable for underfloor heating. It does not contain solvents, is flexible after bonding, but above all safe for the finished varnished or oiled floor, because glue residues can be removed without damaging the floor even after a few days. The glue should only be used indoors.
- quiet floor – the most effective way to absorb impact sounds
- possibility of laying on large areas without the need for expansion joints
- gluing-down is also recommended in the case of floor installation on underfloor heating, according to the rule “the less underneath the board the easier it is for heat to penetrate”
- glued-down floor is easier to renovate – sanding
BARLINEK ENGINEERED WOOD FLOORING INSTALLATION INSTRUCTIONS – FLOATING – 5Gc LOCK


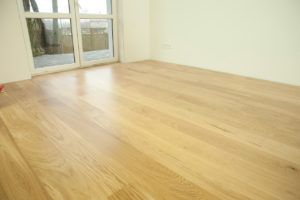

The layered wooden board is a product made in 100% from wood. The structure of the board is very resistant to temperature and humidity changes. Not one, but three layers of wood arranged in a cross pattern result in its high dimensional stability. Each Board is a finished product with the finished top layer, fit for use directly after installation.
Anybody with just a bit of enthusiasm for DIY activities is able to install the floor on their own. Before installation of layered wooden floors, all wet works on the walls, ceilings, attics, etc. such as priming, skimming, painting or application of decorative plasters should be completed. The humidity of the substrate must not exceed 2% for cement, 0.5% for anhydrite, 8% for wood. The relative air humidity should remain within the range of 45% and 60%, and the air temperature within 18 to 24°C (64°F to 75°F). The humidity of the layered wooden board should be 5% to 9%.
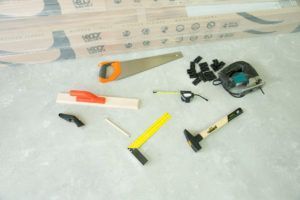
To install our Barlinek board, the following tools will be needed:
1. pull bar
2. wooden tapping block
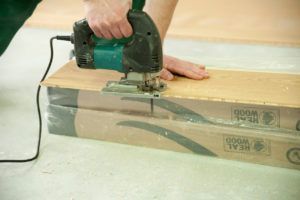
3. hand saw or power saw
4. measurement tape, pencil
5. knife
1.01 Laying a Barlinek board can be done on any dry and even surface. Before the installation, the substrate must be vacuumed and smoothed with a spatula
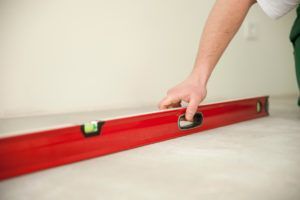
1.02 Check for all substrate level differences before installation. They should not exceed 3mm for 2m length.
1.03 Please remember to condition the board in the factory packaging on site for at least 48 hours before its laying. During that time, the flooring will adjust to the installation and acclimatisation conditions.
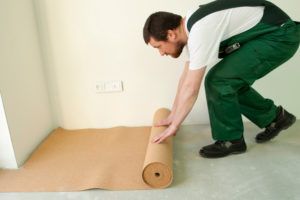
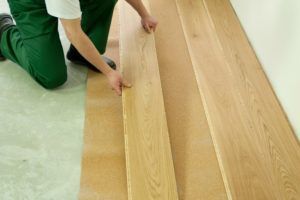
1.04 After vacuuming the screed, you need to place the underlay upon which the floor will be laid down, e.g. natural cork in rolls. Remember to leave a gap of ca. 10 mm between the cork and the wall. Leave a gap of 2-3 mm between adjacent cork mat strips. Other underlayment materials, e.g. pressed natural wood fibre boards, are to be handled likewise.
1.05 The direction of the laying of the Barlinek board is determined by the dimensions of the room and the direction of sunlight. If none of the walls is longer than 8 m, it is recommended to lay the floor towards the light, i.e. parallel to the window letting the most sunshine in. In the case of dimensions exceeding 8 m, or long and narrow rooms, e.g. corridors, the boards should be always installed along the longer side.
1.06 Cut the boxes with the boards from the bottom with a knife in order not to damage the top layer of the board.
1.07 How to lay Barlinek board? Please remember that the wooden layered board is 100% wood and each of them looks unique. Before the installation, spread the boards and plan the pattern of the floor. After that you can start the installation.
1.08 Cut away the tongue from the first strip of the floor, using the saw. This will allow proper execution of the expansion joint, or the wall gap.
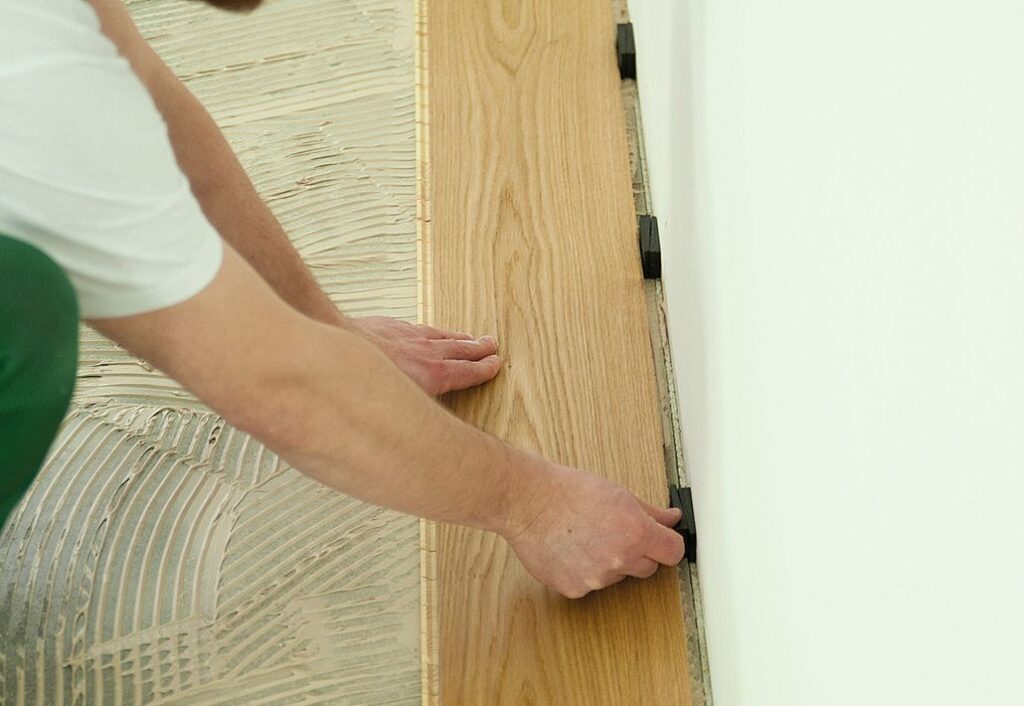
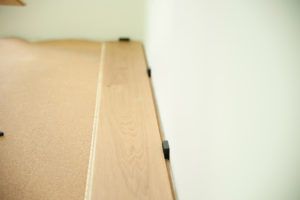
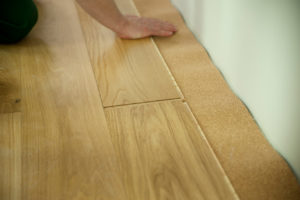
1.09 Place the first board, leaving a gap of 10 mm from each wall thanks to the expansion joint wedges.
1.10 Attach the next board to the shorter edge and lower down. Press the shorter edge of the board with a hand, and the lock will close. Cut the last board in the first floor strip so that an expansion gap of 10 mm is left. The board, cut as described above, is placed with the front lock towards the preceding board.
1.11 Use the cut portion of the board to start the second strip of the floor. Insert it into the lock at the angle of 20°-30°.
1.12 Using the tapping block, connect the Barlinek board on its longer edge.
1.13 Proceed in the same way with the next strips of the floor.
1.14 To install the last strip of the floor, measure the necessary board width decreased by the expansion joint of 10 mm from the wall.
1.15 Connect the board with the pull bar.
1.16 Cover the expansion joint between ceramic tiles and the wooden floor, and in the door frame with a special wooden strip. Installing the floor in the door frame, it is obligatory to leave the expansion joint.
1.16 After the installation of skirting boards, the floor is ready to use.